 Pin it
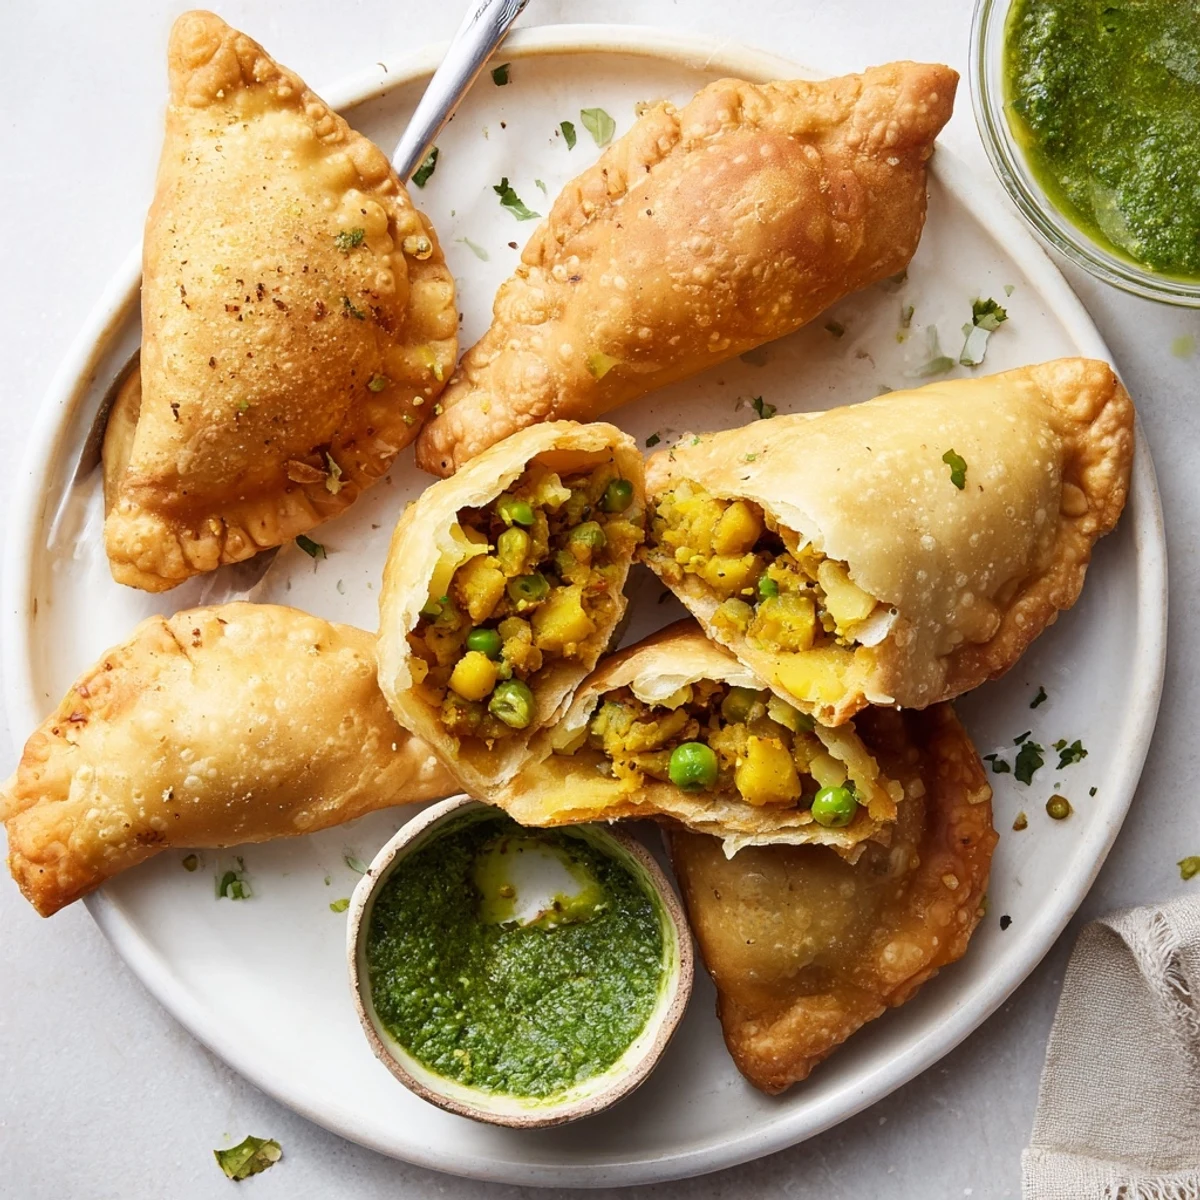
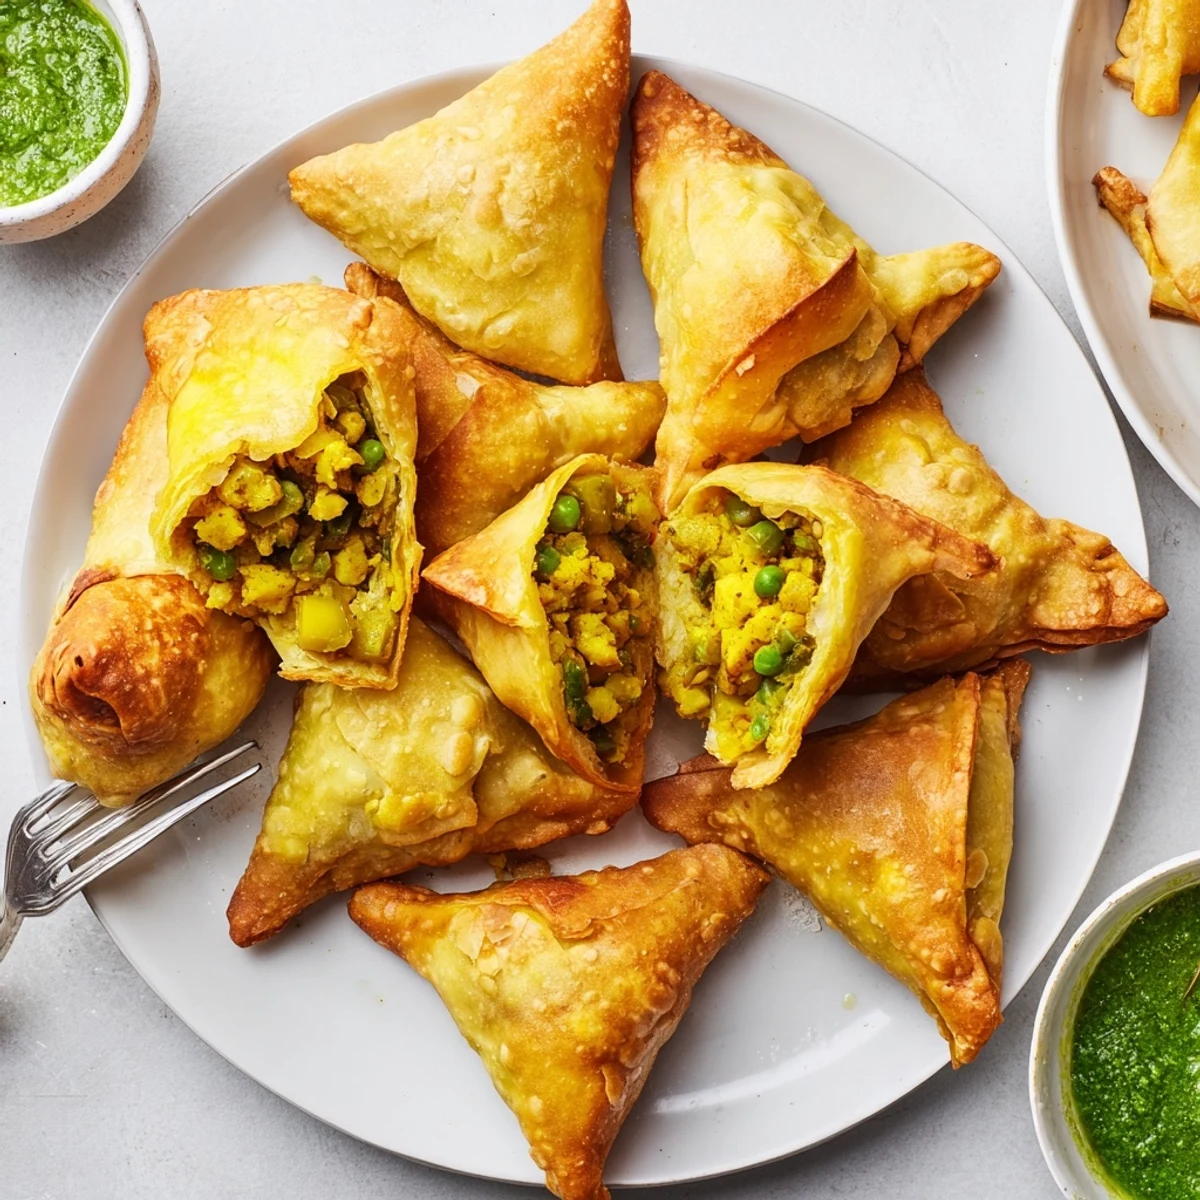
 These crispy triangular pastries feature a golden flaky shell enclosing a flavorful filling of tender potatoes, sweet green peas, and aromatic spices like cumin, coriander, and garam masala. The dough is made from scratch and fried until perfectly crisp, creating an irresistible texture contrast between the crunchy exterior and the soft, well-seasoned interior.
Each batch yields twelve portions, ideal for sharing at gatherings or enjoying as a satisfying snack. The filling balances warmth from ginger, garlic, and green chili with fresh cilantro and a hint of lemon brightness. Serve immediately with mint chutney or tamarind sauce for dipping.
The first time I attempted samosas, my kitchen filled with such incredible aromas that my roommate abandoned her study session to investigate what magic was happening on the stove. We stood over the pan watching those golden triangles turn perfectly crisp, taking tentative bites that burned our tongues because we couldn't wait for them to cool down properly. Now they're my go-to whenever I want to make something that feels like a celebration but doesn't require restaurant skills.
Last Diwali, I made three dozen of these for a potluck and watched them disappear in under fifteen minutes. Someone actually asked for the recipe while still chewing their first samosa, which I took as the highest compliment possible.
Ingredients
- All-purpose flour: Creates the perfect tender yet sturdy wrapper that wont tear during shaping
- Vegetable oil: Rubbed into the flour to create that signature flaky pastry texture
- Potatoes: The heart of the filling, providing creamy substance that soaks up all those aromatic spices
- Green peas: Add tiny bursts of sweetness that balance the warming spices beautifully
- Fresh ginger and garlic: The foundation of authentic flavor, use fresh rather than powdered for the best results
- Garam masala: This warming spice blend gives samosas their distinctive Indian comfort food essence
- Fresh cilantro: Adds bright herbal notes that lift the entire filling out of heaviness
- Lemon juice: A crucial splash of acidity that makes all the spices sing instead of muddling together
Instructions
- Make the pastry dough:
- Rub the oil into the flour until it looks like coarse sand, then gradually add just enough water to form a smooth, pliable dough that rests while you prepare the filling.
- Cook the aromatic filling:
- Sauté your onions, ginger, and garlic until fragrant, then bloom your spices in the hot oil before adding the potatoes and peas to create a deeply flavored mixture.
- Shape into triangles:
- Roll dough circles, cut them in half, and form each semi-circle into a cone sealed with water, filling generously before crimping the edges into that classic triangular shape.
- Fry until golden:
- Heat your oil to the right temperature and fry in batches, turning occasionally until each samosa achieves that perfect deep golden color and sounds hollow when tapped.
 Pin it
 My grandmother would sit at the kitchen table shaping samosas with such practiced speed that her hands were almost a blur. I'm nowhere near that efficient, but something meditative takes over when you find your rhythm with the folding and crimping.
Getting The Consistency Right
The dough should feel soft like playdough but not sticky. If it's too dry, the edges won't seal properly and your filling will escape into the hot oil in a tragic mess. Too wet and you'll struggle to roll it thin enough without tearing.
Folding Techniques
Don't stress if your first few look more like rustic pyramids than perfect triangles. They'll still taste incredible, and by the time you reach the last ball of dough, your fingers will have learned the motion through happy repetition.
Make Ahead Strategy
You can freeze uncooked samosas on a baking sheet before transferring them to a bag, then fry straight from frozen when cravings strike. Just add a couple extra minutes to the cooking time.
- Place frozen samosas in cold oil and bring temperature up gradually to prevent burning outside before inside cooks
- If baking instead of frying, brush with oil and cook at high heat for that closest-to-fried texture
- These reheat surprisingly well in a 350 degree oven, never the microwave or you'll lose all that precious crispness
 Pin it
 There's something deeply satisfying about pulling a batch of these from the oil, arranging them on a platter, and watching people's faces light up as they take that first crispy, spicy bite.
Recipe FAQs
- → What makes the pastry crispy?
-
The combination of all-purpose flour rubbed with vegetable oil creates a tender yet sturdy dough that fries into a crispy, golden shell. The oil in the dough prevents it from becoming tough, while deep frying at the right temperature ensures maximum crispiness.
- → Can I bake instead of fry?
-
Yes, brush assembled pastries lightly with oil and bake at 400°F for 25-30 minutes, turning halfway through. The texture will be slightly less crispy but still delicious.
- → How do I prevent filling from leaking during frying?
-
Ensure the edges are well-sealed with water before frying. Let the filling cool completely before stuffing, and avoid overfilling each cone. A properly sealed triangle holds everything inside.
- → Can I make the filling ahead of time?
-
Absolutely. Prepare the spiced potato filling up to 2 days in advance and store in the refrigerator. Bring to room temperature before filling the dough for best results.
- → What dipping sauces pair best?
-
Mint chutney, tamarind sauce, or sweet mango chutney are traditional accompaniments. The cool, tangy flavors balance the warm, spiced filling beautifully.
- → How do I store leftovers?
-
Keep in an airtight container for up to 2 days. Reheat in a 350°F oven for 10-15 minutes to restore crispiness. Avoid microwaving as they become soggy.
