 Pin it
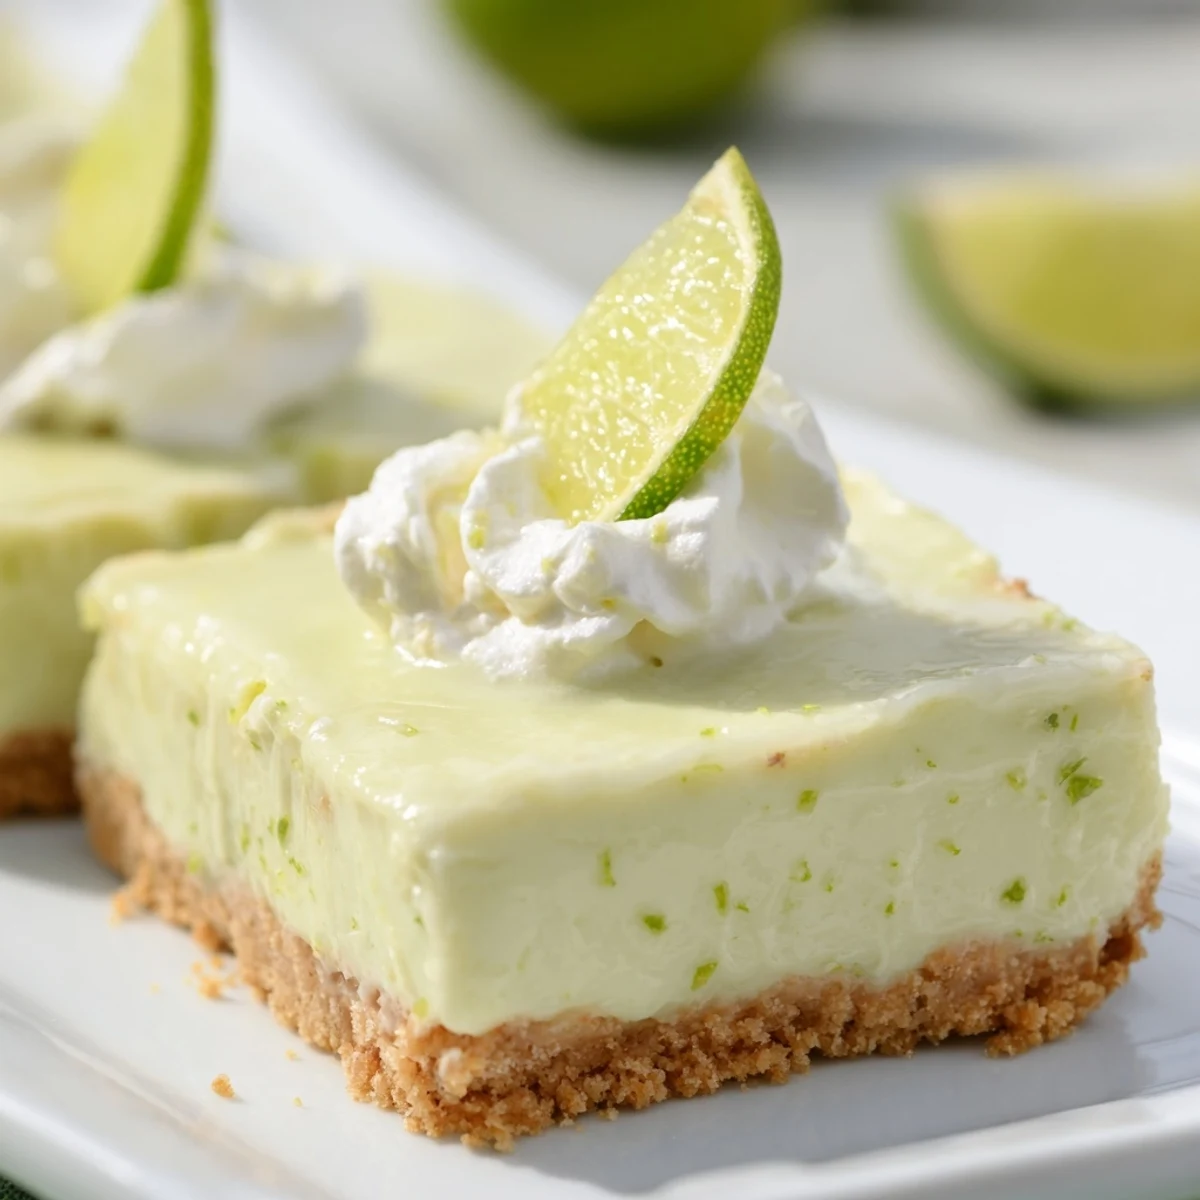
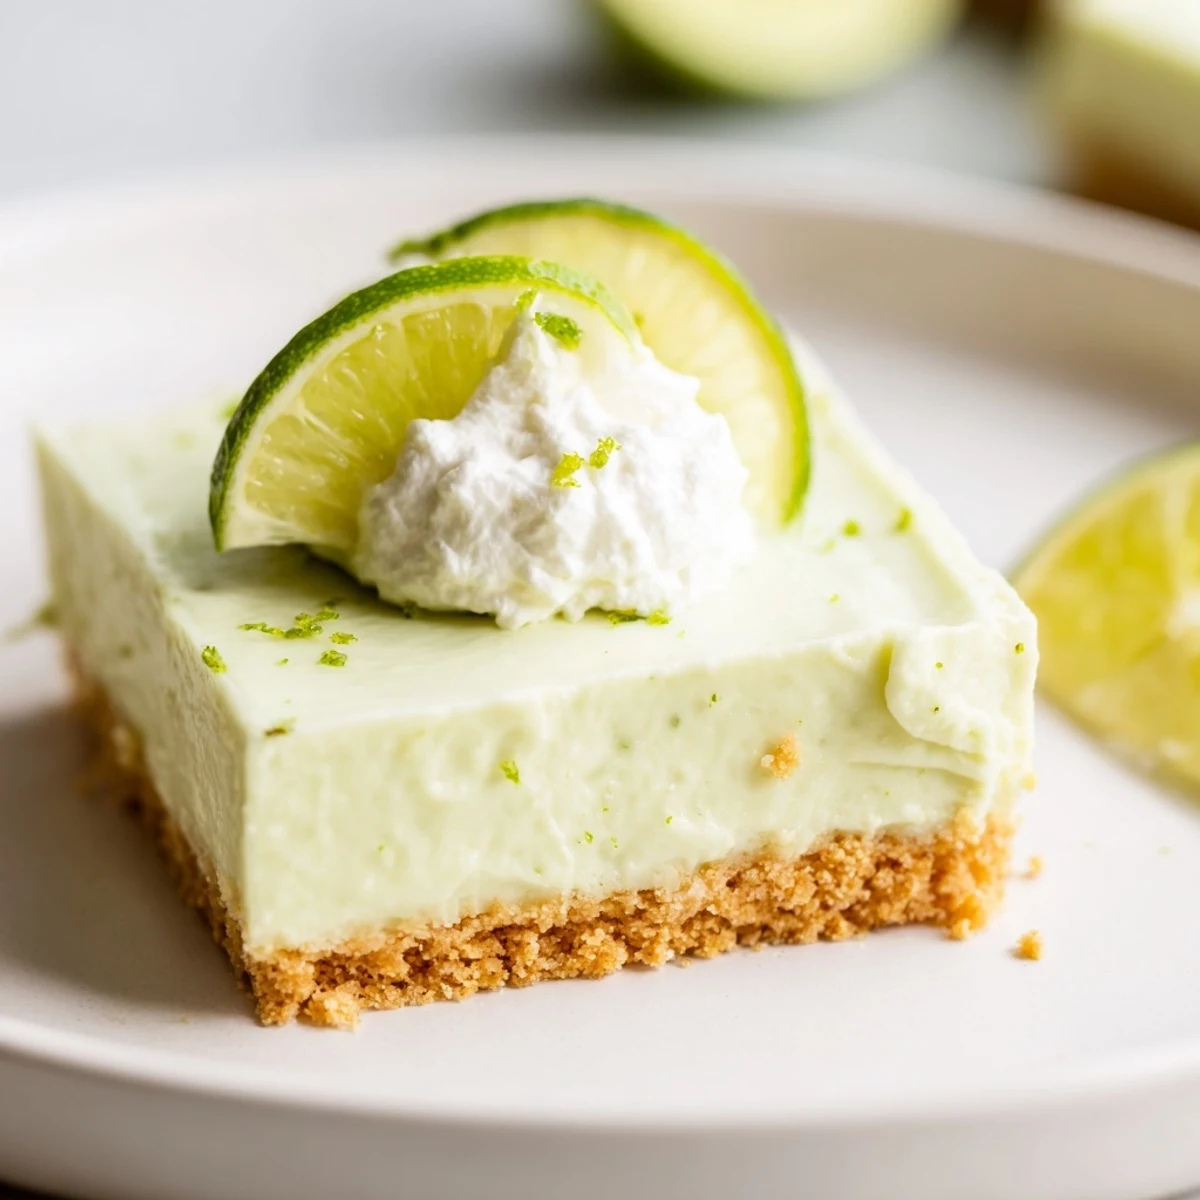
 These bars feature a tangy and creamy key lime filling resting on a buttery graham cracker crust. The crust is baked until lightly golden before pouring the smooth lime mixture on top and baking again until set but slightly jiggly. After chilling thoroughly, the bars are cut into squares and can be garnished with whipped cream and lime zest for extra zestiness and texture. Fresh key lime juice is recommended for best results, and a gluten-free variation can be made by substituting the crust ingredients. This chilled treat combines bright citrus flavors with a crunchy base, creating a perfect balance of tartness and sweetness.
Last summer I was scrolling through my phone at midnight, recipe-hunting for something to bring to a friends beach gathering, and these bars stopped me in my tracks. Something about that electric green filling against golden crust felt like sunshine on a plate. I made them at eleven o'clock that night with all the windows open, letting the buttery graham cracker scent drift through the entire apartment.
I brought those late-night bars to the beach the next day, still slightly nervous about how they turned out. Within minutes, my friend Sarah was already demanding the recipe while her husband hovered around the serving platter for seconds. They've since become my go-to whenever I need something that feels impressive but comes together with zero stress.
Ingredients
- Graham cracker crumbs: The foundation of everything good. Crushing them yourself gives you control over texture—fine for smooth, slightly chunky for rustic.
- Granulated sugar: Just enough to sweeten the crust without making it cloying. It helps the crumbs hold together when pressed.
- Unsalted butter: Melt it completely and let it cool slightly before mixing. This is what transforms dry crumbs into something that bakes into a solid, sliceable base.
- Egg yolks: Room temperature yolks incorporate more easily into the condensed milk, giving you that silky, custard-like consistency.
- Sweetened condensed milk: The backbone of the filling. Do not use evaporated milk—they are completely different animals.
- Key lime juice: Fresh gives you that floral brightness that bottled juice sometimes misses, but the acidity works either way.
- Lime zest: This is where all the aromatic oil lives. Zest before juicing, and press firmly to get those bright green flecks.
- Salt: Just a pinch, but it wakes up all the other flavors and keeps the sweetness from falling flat.
Instructions
- Prep your pan and oven:
- Lining with parchment paper is non-negotiable for easy lifting, and leaving those overhangs like little handles will save you so much frustration later.
- Build the crust:
- Mix until the crumbs hold together when you squeeze a handful—thats your cue that the butter ratio is right.
- Par-bake the crust:
- Ten minutes gives you structure without drying it out completely. You want it set, not brittle.
- Whisk your filling base:
- Getting those yolks slightly thickened before adding anything else creates a smoother, more stable filling that wont separate.
- Combine filling ingredients:
- Fold gently—youre incorporating air, not beating it into submission. Over-mixing can make the texture foam instead of cream.
- Add filling to crust:
- Pour slowly and let it settle. The warm crust helps the filling spread without leaving air bubbles trapped underneath.
- Bake until set:
- That slight jiggle in the center is your friend. Over-baked filling cracks and tastes grainy; under-baked never sets properly.
- Chill completely:
- This is the hardest part but also the most important. Those two-plus hours in the fridge transform the texture from loose to luxurious.
 Pin it
 These bars have become my emergency dessert for every occasion because they never fail to impress. Last month I made them for my sisters birthday, and she said the bright lime flavor reminded her of our trip to Florida years ago.
Making Them Your Own
Regular Persian limes work beautifully if key limes are out of season or just too precious for your budget. The flavor profile shifts slightly—less floral, more straightforward citrus—but the result is still completely delicious.
Storage Secrets
These actually improve overnight as the flavors meld and the texture firms up even more. Store them in the refrigerator, covered, and they will happily wait three to four days for you.
Serving Suggestions
A dollop of lightly sweetened whipped cream adds that cloud-like contrast against the dense, tangy filling. Sometimes I add fresh berries—strawberries or blueberries—because their sweetness balances the sharp lime perfectly.
- Let bars sit at room temperature for ten minutes before serving for the best texture
- Clean your knife between cuts for those picture-perfect restaurant-style squares
- These freeze surprisingly well if you want to get ahead
 Pin it
 These bars might just become the dessert everyone associates with you, the one people request before they even ask what else is on the menu.
Recipe FAQs
- → Can I use regular lime juice instead of key lime?
-
Yes, regular lime juice can be substituted if key lime juice is unavailable, but key lime adds a slightly more intense tartness and unique flavor.
- → How long should the bars chill before serving?
-
It’s best to chill the bars for at least 2 hours, preferably 3 to 4 hours, to allow the filling to fully set and develop flavor.
- → Can I make these bars gluten-free?
-
Yes, you can use gluten-free graham crackers or similar gluten-free crumbs for the crust to accommodate gluten-free diets.
- → What is the texture of the key lime filling after baking?
-
The filling should be set but still have a slight jiggle in the center, offering a creamy yet firm texture perfect for slicing.
- → What garnish options complement these bars?
-
Whipped cream and additional lime zest or thin lime slices enhance the tangy flavors and add a fresh, creamy contrast.
