 Pin it
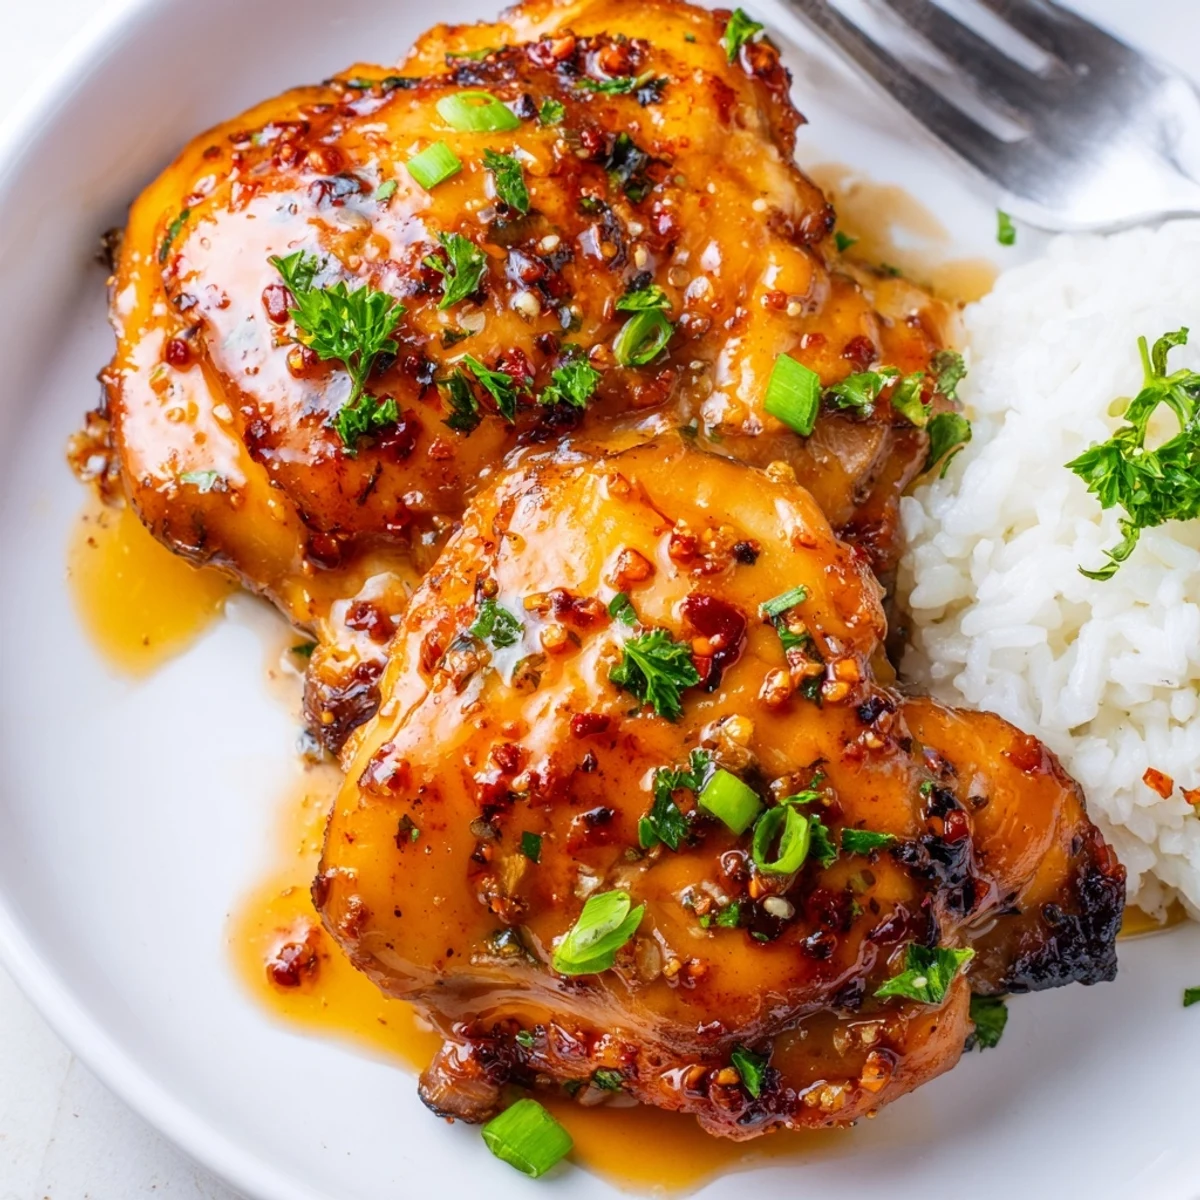
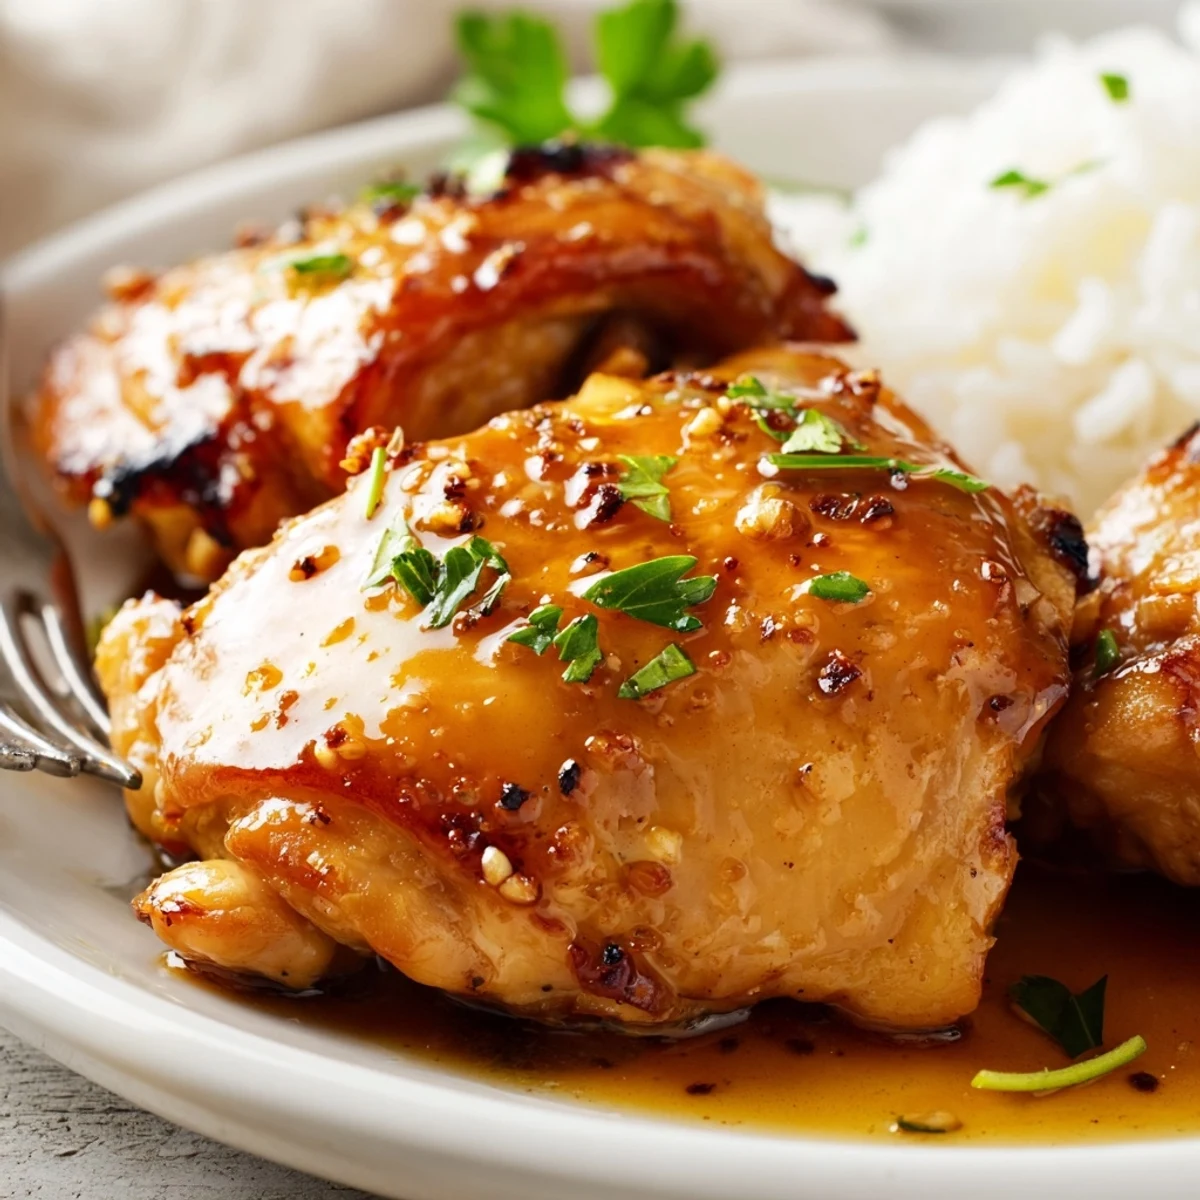
 Tender, juicy chicken thighs are seasoned, seared, and finished in a glossy honey-butter and soy glaze for a sweet-salty, sticky coating. After browning, the sauce of butter, honey, garlic, soy, vinegar and mustard is reduced briefly, then the thighs are returned to the pan and baked until cooked through. Broil briefly for extra caramelization and serve with rice or steamed vegetables.
The first time I made this honey butter chicken, my kitchen smelled like a fairytale. Something about honey hitting hot butter creates this incredible aroma that makes everyone wander in asking whats for dinner. I've since learned to double the sauce because people fight over the sticky bits left on the pan.
Last Tuesday my roommate walked in right as I was pulling the skillet from the oven. She literally stopped mid sentence and asked if we were having restaurant takeout. That's the thing about this dish, it looks fancy enough for company but comes together on a weeknight.
Ingredients
- 8 boneless skinless chicken thighs: Thighs have more fat than breasts which means they stay tender and juicy even with high heat cooking
- 1 teaspoon salt: Essential for bringing out the natural chicken flavor
- ½ teaspoon black pepper: Freshly ground gives the best bite
- ½ teaspoon garlic powder: Distributes evenly better than fresh garlic in the seasoning blend
- ¼ teaspoon smoked paprika: Adds this subtle smoky depth that makes people wonder what your secret ingredient is
- ¼ cup unsalted butter: The foundation of that luscious sauce
- ⅓ cup honey: Creates the sticky glaze and balances the savory elements
- 2 tablespoons soy sauce: Use tamari if you need it to be gluten free
- 3 garlic cloves minced: Fresh garlic in the sauce gives you those aromatic pockets of flavor
- 1 tablespoon apple cider vinegar: Cuts through all that sweetness perfectly
- 1 teaspoon Dijon mustard: The secret ingredient that makes the sauce taste complex
- 2 tablespoons chopped fresh parsley: Adds this fresh pop of color against the golden sticky chicken
- Sliced green onions: Their mild onion flavor plays so nicely with the honey
Instructions
- Get your oven ready and season the chicken:
- Preheat your oven to 400°F and pat those chicken thighs completely dry with paper towels. Mix together your salt pepper garlic powder and smoked paprika then season both sides of each thigh really well.
- Sear the chicken for golden color:
- Heat a large oven safe skillet over medium high heat with a splash of oil. Sear the chicken for 2 to 3 minutes per side until you get this gorgeous golden brown crust.
- Build that honey butter sauce:
- Reduce the heat to medium and melt the butter right in the same pan. Stir in the honey soy sauce minced garlic vinegar and Dijon mustard letting it simmer for 1 to 2 minutes until it thickens slightly.
- Coat and roast to perfection:
- Return the chicken to the skillet turning each piece to coat it in that glorious sauce. Bake for 20 to 25 minutes basting once or twice until the chicken reaches 165°F internally.
- Finish with fresh herbs:
- Let the chicken rest for a couple minutes then spoon all that sticky sauce over the top. Sprinkle with parsley and green onions before serving.
 Pin it
 This recipe has become my go to when friends are coming over and I want something that looks impressive but doesn't require hours of prep. Last time I made it my friend asked for the recipe before she even took her second bite.
The Secret To Perfect Sticky Glaze
Here's something I learned after making this countless times. The sauce needs those few minutes of simmering on the stove before it goes in the oven. That brief time lets the honey and butter become friends and start thickening. If you skip this step you'll still have delicious chicken but you won't get that restaurant quality sticky coating that makes this dish special.
Side Dishes That Actually Work
I've served this with so many sides over the years and some pairings are definitely better than others. Steamed broccoli with a squeeze of lemon cuts through all that sweetness perfectly. But honestly my favorite is just fluffy white rice because it soaks up every drop of that sauce. Roasted green beans with garlic are another winner if you want something with a bit of crunch.
Making It Ahead And Reheating
You can absolutely make the sauce up to 3 days ahead and keep it in the fridge. When you're ready to cook just rewarm it gently in the pan. The chicken is best cooked fresh but leftovers reheat surprisingly well at 350°F for about 15 minutes. The sauce might look separated when you first pull it out of the fridge but it comes back together beautifully with a little warmth.
- Add a splash of water when reheating if the sauce seems too thick
- The broiler trick works wonders for reviving leftover pieces
- Never microwave this dish or you'll lose that gorgeous sticky texture
 Pin it
 There's something deeply satisfying about a recipe that delivers such impressive results with such simple ingredients. Hope this becomes one of your weeknight staples too.
Recipe FAQs
- → Can I use bone-in thighs instead?
-
Yes. Swap in bone-in pieces but add about 5–10 minutes to the baking time and check doneness with a meat thermometer (165°F / 74°C). Searing first still improves browning and flavor.
- → How do I get a thicker, stickier glaze?
-
Simmer the sauce a little longer before returning the chicken to concentrate it. For faster thickening, whisk 1 teaspoon cornstarch with 1 tablespoon cold water and stir into the simmering sauce until glossy.
- → What can I use instead of soy sauce for a gluten-free option?
-
Use tamari or a certified gluten-free soy sauce. Both provide similar umami; adjust saltiness to taste since levels vary by brand.
- → How should leftovers be stored and reheated?
-
Cool and refrigerate in an airtight container for up to 3–4 days. Reheat gently in a 325°F oven covered for 10–15 minutes, or warm slices in a skillet with a splash of water to loosen the glaze.
- → How can I add heat to the glaze?
-
Stir in ½ teaspoon red pepper flakes or a drizzle of sriracha to the sauce while it simmers. Taste and adjust so the heat balances the honey's sweetness.
- → Is broiling necessary for a caramelized finish?
-
Not required, but broiling for 2–3 minutes at the end deepens color and caramelization. Watch closely to avoid burning the sugars in the glaze.
