 Pin it
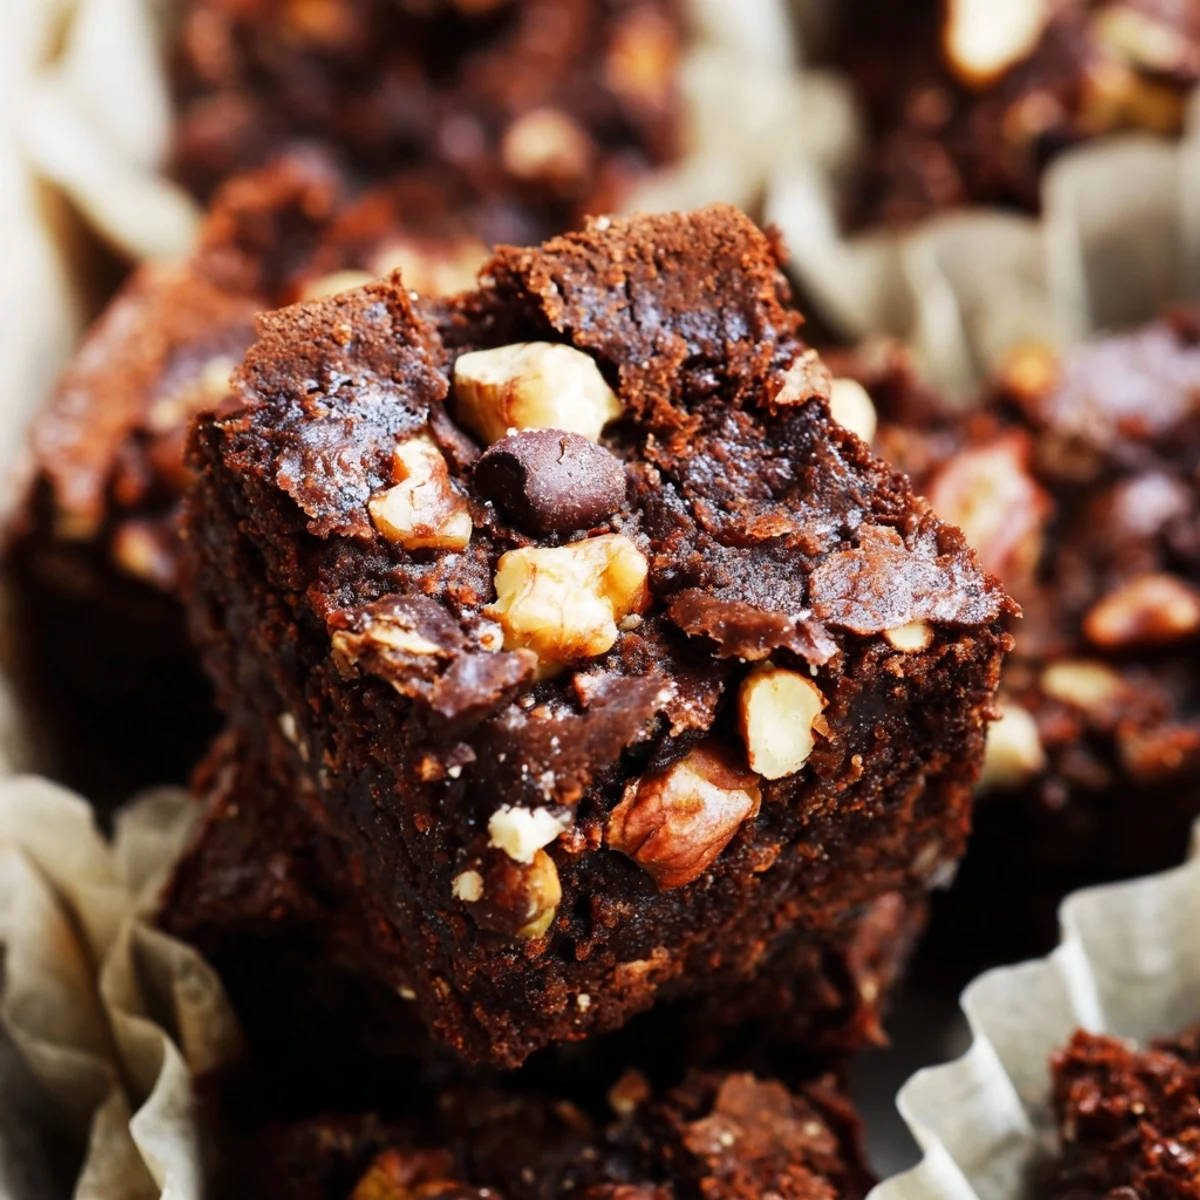
 Create rich, fudgy brownie bites loaded with crunchy mixed nuts for the ultimate snack. These miniature treats combine a moist, dense chocolate center with the satisfying texture of walnuts, pecans, or hazelnuts. Quick to prepare and bake, they are ideal for parties, gatherings, or whenever a chocolate craving strikes.
My coworker Sarah brought these brownie bites to the office one Thursday, and I watched them disappear in under an hour—even the usually quiet accountant came back for seconds. She told me later it was her grandmother's fudgy base mixed with a handful of nuts she'd toasted while on a phone call, and that simple combination stuck with me. Now whenever I need something that feels both homemade and sophisticated, I make a batch of these, because they prove that the best desserts don't require fancy techniques, just real ingredients and a little care.
I baked these for my partner's book club last month, and someone actually asked if I'd bought them from a bakery—that moment of quiet pride when a homemade dessert gets mistaken for professional work is hard to replicate. The table got quiet when people bit into them, which I've learned is the best kind of feedback in a room full of food lovers.
Ingredients
- All-purpose flour (3/4 cup): This is your structure; don't skip sifting it with the cocoa powder or you'll trap air bubbles that make the brownie cake-like instead of fudgy.
- Unsweetened cocoa powder (1/4 cup): The difference between a cocoa-forward bite and a sweet one, so taste your brand first—some are more bitter than others.
- Baking powder (1/2 tsp): Just enough to help them rise slightly without making them fluffy; resist the urge to add more.
- Salt (1/4 tsp): This small amount sharpens the chocolate flavor and balances the sweetness in a way people won't be able to name.
- Unsalted butter (1/2 cup, melted): Melted butter creates a denser crumb than softened, which is exactly what you want here.
- Granulated sugar (3/4 cup) and light brown sugar (1/4 cup, packed): The brown sugar adds moisture and depth; using both gives you complexity you can't achieve with one type alone.
- Large eggs (2): Room temperature eggs incorporate more smoothly and create a better texture; let them sit out for 10 minutes if you remember.
- Pure vanilla extract (1 tsp): This sounds small but it rounds out the chocolate and makes the whole bite taste more refined.
- Mixed nuts (1 cup, roughly chopped): Walnuts, pecans, and hazelnuts all work, but avoid over-processing them—you want visible pieces that add crunch.
- Semisweet chocolate chips (1/2 cup, optional): These are optional but they're worth it; they give you little pockets of extra chocolate that justify reaching for a second bite.
Instructions
- Prep your tin and heat your oven:
- Set the oven to 350°F and line a mini muffin tin with paper liners or a light grease—this prevents sticking without affecting the brownie's edge texture. Mini muffins bake faster than regular ones, so the lower temperature keeps the outside from over-browning before the inside sets.
- Combine your dry ingredients:
- Whisk together the flour, cocoa powder, baking powder, and salt in a medium bowl, making sure there are no cocoa lumps hiding at the bottom. This step is worth doing mindfully because lumpy cocoa powder will show up as bitter specks in your finished bite.
- Cream your butter and sugars:
- Whisk the melted butter with both sugars until the mixture looks smooth and slightly glossy, about 1 minute of whisking. This blending helps the sugars dissolve and creates a better texture in the final brownie.
- Add eggs one at a time:
- Add each egg separately, whisking well after each one so the mixture emulsifies properly; rushing this step can lead to a grainy texture. When all three are in, stir in the vanilla extract and notice how the batter becomes silkier.
- Combine wet and dry:
- Fold the dry ingredients into the wet mixture using a spatula, stirring just until the flour disappears—overmixing develops gluten and makes the brownie tough and cake-like instead of fudgy. If you see a few streaks of flour, stop; those will disappear in the oven.
- Fold in the nuts and chips:
- Gently stir in the chopped nuts and chocolate chips so they're evenly distributed without crushing the nuts further. The batter should look studded and rich at this point.
- Fill the muffin tin:
- Spoon the batter into the prepared tin, filling each cup about three-quarters full; overfilling makes them overflow, but underfilling makes them dry. A small ice cream scoop helps keep portions even and your batter distribution tidy.
- Bake until just set:
- Bake for 15 to 20 minutes, watching for the moment when the tops look set but a toothpick inserted in the center comes out with a few moist crumbs—not clean, not fudgy pudding, but somewhere in between. That moment is what separates a good brownie bite from an amazing one.
- Cool and transfer:
- Let them rest in the tin for 10 minutes so they firm up enough to handle without falling apart, then move them to a wire rack to cool completely. If you eat one while it's still warm, that's between you and the brownie.
 Pin it
 The real magic happened when my niece, who's usually suspicious of anything with vegetables or 'healthy' in the description, ate three of these without asking questions. Later she asked if I'd made them myself, and when I said yes, she looked at her hands covered in chocolate and smiled in that way kids do when they realize homemade isn't code for boring.
Getting the Texture Right
The line between fudgy and underbaked is thinner than you'd think, which is why I learned to trust my instincts over the timer. A toothpick with a few moist crumbs isn't the same as raw batter—you're looking for that faint shimmer on a crumb, the moment when the brownie has set structurally but still holds moisture. I used to pull them out too early thinking I was being clever, but those bites were disappointing; now I give them the full time and let the residual heat do its final work while they cool in the tin.
Why Mini Muffins Work Better Than Bar Brownies
Bar brownies are great for feeding a crowd, but there's something about the individual cake that makes these special—more surface area means more of that crucial fudgy-crispy edge, and the mini size makes them feel like an actual treat rather than a guilt-driven snack. Plus, they're portion control masquerading as indulgence, which is a win in my kitchen. When you're reaching for something small and singular, you feel more intentional about eating it, and somehow that makes each bite taste better.
Storage and Second-Day Magic
I store these in an airtight container at room temperature, and they honestly taste better on day two once the flavors have settled and mellowed slightly. If you absolutely must freeze them, they'll keep for two weeks wrapped tightly in plastic wrap inside a freezer bag, and thawing them at room temperature brings back that fudgy texture almost entirely. Here's what I've learned about keeping them fresh:
- Keep them in an airtight container, and if you notice them drying out, a slice of bread in the container adds subtle moisture without making them soggy.
- Don't refrigerate them unless your kitchen is unusually warm; the cold intensifies cocoa bitterness and hardens the crumb texture.
- If you find yourself eating them straight from the container at 11 p.m., that's a sign you nailed the recipe.
 Pin it
 These brownie bites have become my go-to when I want to show up somewhere with something homemade but not precious or fussy. They're proof that sometimes the most satisfying treats are the ones that taste like they took more effort than they actually did.
Recipe FAQs
- → Can I use different types of nuts?
-
Yes, you can use walnuts, pecans, hazelnuts, or substitute with seeds for a nut-free version.
- → How should I store these brownie bites?
-
Store them in an airtight container at room temperature for up to 4 days to maintain freshness.
- → Can I add chocolate chips to the batter?
-
Absolutely, folding in semisweet chocolate chips adds extra decadence and a gooey texture.
- → How do I know when the brownies are fully baked?
-
The tops should be set, and a toothpick inserted into the center should come out with a few moist crumbs.
- → Is it possible to make these gluten-free?
-
Yes, simply replace the all-purpose flour with a gluten-free flour blend designed for baking.
