 Pin it
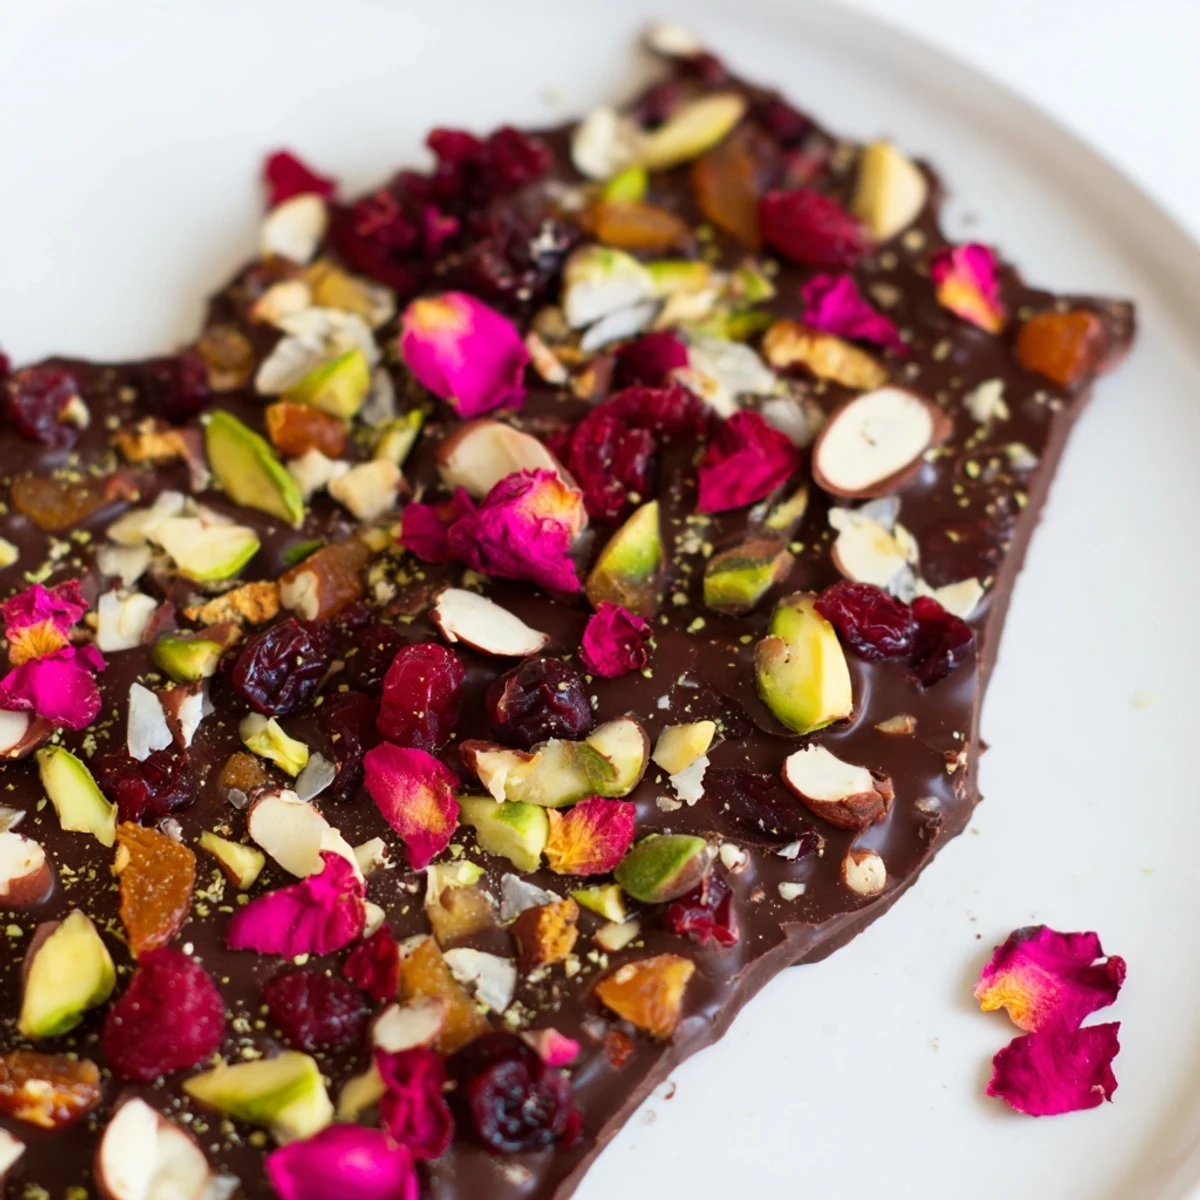
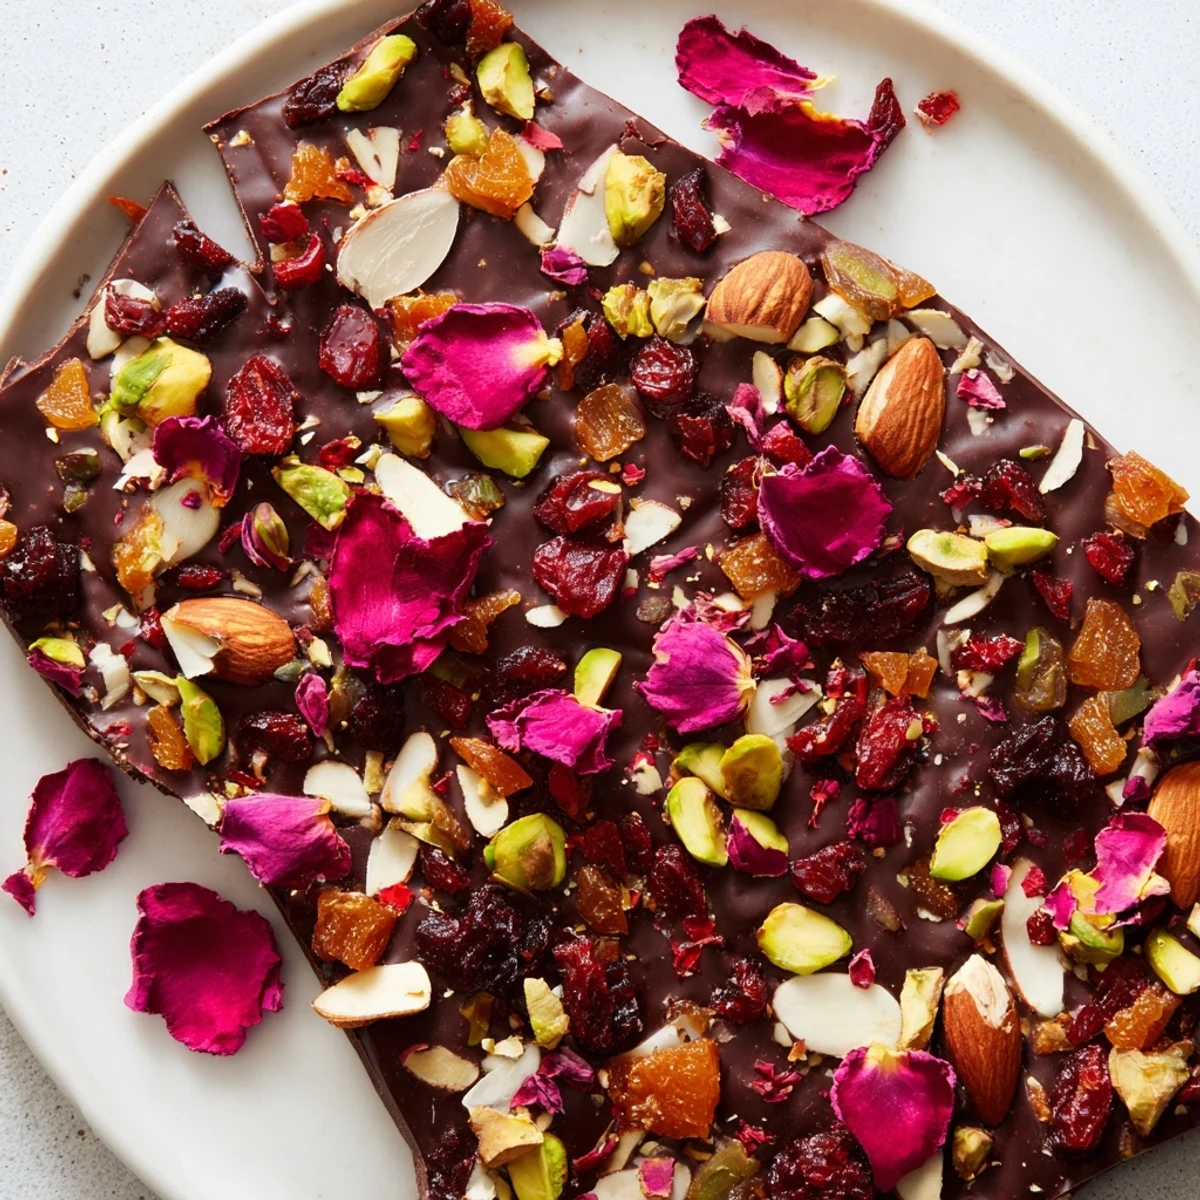
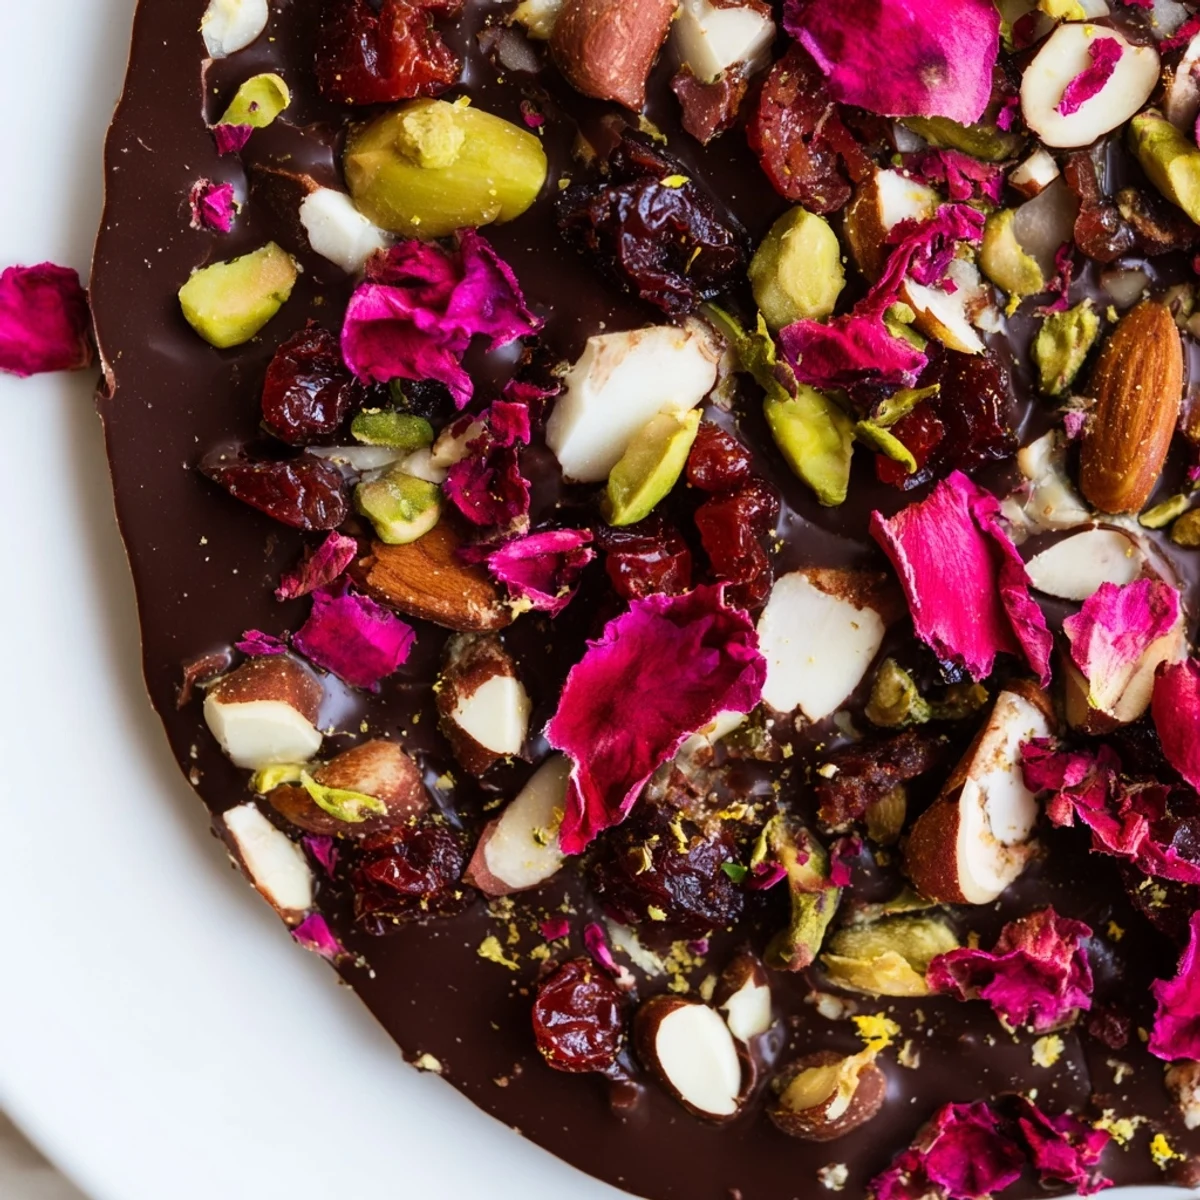
 This elegant chocolate bark combines melted dark chocolate with vibrant dried cranberries, apricots, pistachios, and almonds for a visually stunning treat. Drizzle with white chocolate for extra elegance, then top with freeze-dried berries and edible rose petals.
The simple method takes just 20 minutes of hands-on time, with the chocolate setting in one hour at room temperature or 30 minutes in the refrigerator. Break into pieces and enjoy immediately or package beautifully for gifting. Each bite delivers rich chocolate balanced with tart-sweet dried fruits and satisfying nuts.
Last February, my kitchen counter transformed into a canvas of colors when I first attempted this chocolate bark. The cold winter light streamed through my window as I arranged jewel-toned fruits atop pools of melting chocolate, the sweet aroma filling my small apartment. What began as a simple gift for friends became my signature Valentine's treat, requested year after year by those who've tasted it.
The first time I brought this bark to our neighborhood gathering, the conversation stopped mid-sentence as everyone reached for a piece. My typically stoic neighbor asked for the recipe with such earnestness I couldnt help but smile. By evenings end, I was promising to make double batches for the next get-together, scribbling my recipe onto napkins.
Ingredients
- High-quality dark chocolate: The foundation of your bark deserves the best you can find, as I learned when using discount chocolate resulted in a grainy texture rather than that satisfying snap.
- Dried cranberries: These little bursts of tartness cut through the richness of the chocolate, creating perfect balance in each bite.
- Pistachios: Their vibrant green color creates visual magic against the dark chocolate, while adding a subtle buttery crunch.
- Freeze-dried berries: I discovered these add intense flavor without the moisture that can make chocolate seize, plus they look like tiny jewels scattered across the surface.
Instructions
- Prepare your canvas:
- Line your baking sheet with parchment paper, extending it slightly over the edges for easy removal later. This simple step saved me countless frustrating attempts to pry finished bark from the pan.
- Master the melt:
- Whether using a double boiler or microwave, the key is patience with the dark chocolate, stirring frequently until it becomes glossy and smooth. You can smell when its ready, a deep cocoa aroma that fills the kitchen.
- Create your base:
- Pour that silky chocolate onto your prepared sheet and spread it into an even layer about 6mm thick. Work quickly but dont panic, the chocolate stays workable longer than youd think.
- Add white swirls (optional):
- If using white chocolate, melt it separately and drizzle over the dark chocolate. Take a toothpick and gently swirl the two chocolates together for a marbled effect that looks impressively professional.
- Sprinkle with joy:
- This is where creativity shines, distributing your dried fruits, nuts, and any decorative elements across the surface. I like to ensure every future piece will have a bit of everything.
- Set the stage:
- Gently press the toppings into the chocolate to ensure they stick. The warmth of your fingertips might leave small impressions in the chocolate, but these become part of its handmade charm.
- Practice patience:
- Allow your creation to set completely before breaking it apart. The anticipation builds as the chocolate transforms from glossy to matte, signaling its ready.
- Break with intention:
- Rather than cutting with a knife, breaking the bark creates natural, rustic edges that add to its artisanal appeal. Each piece becomes unique, like a small edible work of art.
 Pin it
 One Valentine's Day, when snowstorms canceled our dinner reservations, this bark became the centerpiece of an impromptu indoor picnic. We sat on the floor with pillows, breaking pieces of chocolate between sips of wine, laughing at how something so simple could feel more special than the fancy restaurant wed planned. Now we make it together every year, even when reservations are available.
Gifting Ideas
When packaged in clear cellophane bags tied with red ribbon, this bark transforms into a gift that outshines store-bought chocolates every time. Ive watched recipients carefully untie the package, their faces lighting up at the colorful mosaic inside, often sneaking a piece before even setting down the bag. Adding a small handwritten note about the ingredients makes it even more personal, especially for those who appreciate knowing the story behind their food.
Flavor Variations
During summer months, I swap in dried blueberries and cherries with lemon zest for a brighter profile that pairs beautifully with afternoon tea. Winter calls for warming additions like candied ginger, orange peel, and a light sprinkle of cinnamon which creates an aroma that makes the whole house feel cozy. For friends who prefer milk chocolate, I reverse the ratio using milk as the base with dark chocolate drizzled on top, though it tends to be significantly sweeter and benefits from extra nuts for balance.
Storage Secrets
The way you store this bark dramatically affects how long that perfect texture lasts. I learned through trial and error that airtight containers are non-negotiable, as the chocolate absorbs surrounding odors and humidity with alarming efficiency.
- Keep pieces separated by small squares of parchment paper to prevent them from fusing back together in warmer temperatures.
- For gifting, refrigerate briefly before packaging so fingerprints dont mar the surface while youre handling it.
- If you live somewhere humid, store in the refrigerator but always allow it to come to room temperature before serving for the best flavor experience.
 Pin it
 This Valentine Chocolate Bark has become more than just a recipe in my collection, its a tradition that marks the season of love in our home. Whether shared with a special someone or gifted to friends who need a little sweetness, it carries with it the simple message that homemade treats, made with intention, are one of the purest expressions of affection.
Recipe FAQs
- → How do I prevent the chocolate from seizing when melting?
-
Use the double boiler method or microwave in 30-second bursts, stirring between each interval. Avoid overheating above 115°F (46°C). Keep all utensils completely dry, as even a drop of water can cause chocolate to seize. If using a microwave, start with shorter bursts for dark chocolate.
- → Can I make this ahead for a party?
-
Yes, this dessert stores beautifully for up to 2 weeks in an airtight container at room temperature. You can prepare it 3-4 days in advance, making it ideal for parties or gift giving. For longer storage, refrigerate for up to 3 weeks in a cool, dry environment.
- → What's the best way to break the bark into pieces?
-
Once fully set, place the bark on a cutting board and use a sharp knife to cut into desired sizes, or simply break with your hands into irregular shards. For cleaner edges, chill for 15 minutes before breaking. Let the pieces come to room temperature for the best chocolate flavor.
- → How can I make a nut-free version?
-
Simply replace the pistachios and almonds with an equal amount of seeds such as pumpkin or sunflower seeds. You can also use additional dried fruits, coconut flakes, or granola. Toast seeds lightly beforehand for enhanced flavor and texture contrast against the chocolate.
- → What chocolate percentage should I use?
-
Dark chocolate between 60-70% cacao works best for balanced flavor. Higher percentages (70%+) create a more intense, slightly bitter taste, while lower percentages offer more sweetness. Choose high-quality chocolate with minimal additives for smooth melting and rich flavor that complements the fruit toppings.
- → Can I drizzle white chocolate on top?
-
Absolutely! Melt white chocolate separately using the same gentle heating method, then drizzle over the dark chocolate before it fully sets. This creates a beautiful marbled effect. White chocolate melts at lower temperatures than dark chocolate, so monitor closely to prevent burning.
