 Pin it
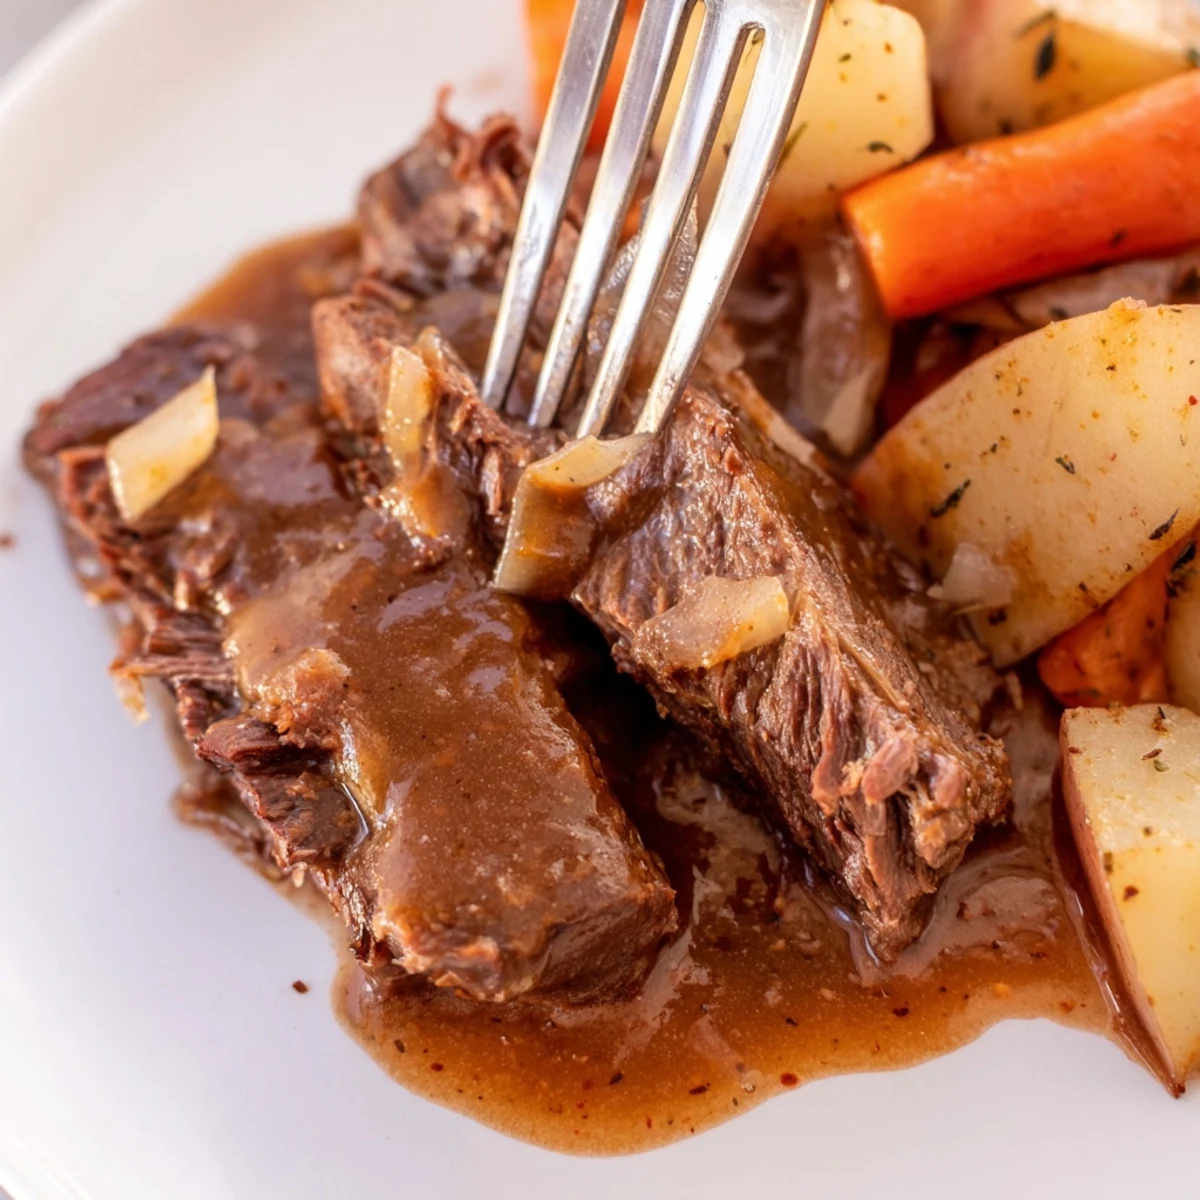
 This comforting pot roast features a 3-pound chuck roast seasoned with salt, pepper, smoked paprika, thyme, and rosemary. The beef sears until golden, then braises slowly with carrots, potatoes, celery, onions, and garlic in beef broth enhanced with Worcestershire sauce. After 3 hours in the oven, the meat becomes fork-tender while absorbing all those Southern flavors. A simple cornstarch gravy thickens the flavorful cooking liquid into the perfect finishing sauce.
My grandmother's kitchen always smelled like this pot roast on Sundays, that rich, deep aroma wrapping around you like a warm blanket before you even stepped through the door. I remember watching her patiently sear the meat, explaining how that crust was what made the gravy taste like something you'd wait all week for. Now whenever I make it, that first whiff takes me right back to her linoleum floor and the sound of gospel music playing softly from the radio.
Last winter, during that ice storm that had us all stuck inside for three days, I threw this roast in the oven around noon. By evening, my neighbor who'd lost power showed up at my door with a bottle of wine, having followed the smell down the hallway. We ended up having an impromptu dinner party that stretched past midnight, everyone crowded around my tiny table, passing bowls of vegetables and spooning gravy over everything.
Ingredients
- 3 lbs chuck roast: This cut has the perfect amount of marbling to break down beautifully during long cooking, and I've learned that buying it with a nice fat cap on top keeps everything incredibly moist
- 1 tsp kosher salt and 1/2 tsp black pepper: Don't skip seasoning every surface thoroughly before searing, that foundation of flavor is what makes the whole dish sing
- 2 tbsp vegetable oil: You need something with a high smoke point here since you're getting that pot good and hot, and this oil won't burn like butter would
- 4 large carrots: Cut them into substantial chunks rather than thin coins, they'll hold their shape better during hours of braising and have a satisfying bite
- 4 medium russet potatoes: Quartered with the skin on adds rustic texture and they'll absorb all those braising liquids like flavor sponges
- 2 celery stalks: Even if you're not someone who snacks on raw celery, it contributes this essential aromatic backbone that you'd miss if it wasn't there
- 1 large yellow onion: Cut into wedges so they don't completely dissolve, giving you sweet, tender bites throughout the dish
- 4 cloves garlic: Mince these fresh rather than using the stuff in the jar, the difference in depth of flavor is worth every second of prep
- 2 cups beef broth: Use the best quality you can find or, even better, homemade if you have it stashed in your freezer
- 1 cup water: This helps stretch the broth without diluting the flavor, and the vegetables will release enough liquid to make up the difference
- 2 tbsp Worcestershire sauce: This is the secret ingredient that adds that deep umami note people can never quite put their finger on
- 2 tsp smoked paprika: The smoke element pairs perfectly with the beef, giving it this subtle barbecue quality without any actual grilling
- 1 tsp dried thyme and 1 tsp dried rosemary: These two herbs together just taste like comfort food, growing more fragrant as they slowly infuse the braising liquid
- 2 bay leaves: They'll quietly work their magic in the background, just remember to fish them out before serving
- 2 tbsp cornstarch: Whisked with cold water, this creates the silky, velvety gravy texture that makes this dish feel so special
Instructions
- Get everything ready before you turn on the heat:
- Mise en place isn't just something chefs say on TV, it's genuinely helpful here since the searing happens fast. Have your seasoned meat, all your prepped vegetables, and your braising liquids measured and waiting within arm's reach.
- Preheat your oven to 325°F:
- This lower temperature is what transforms tough connective tissue into gelatin, giving you that meltingly tender texture. Make sure your oven rack is in the lower middle position before you start.
- Pat the roast completely dry:
- Use paper towels to remove any surface moisture from the meat, then season generously with salt and pepper on every side. This step is crucial because wet meat will steam instead of develop that beautiful brown crust we're after.
- Heat your oil in a heavy Dutch oven:
- Get that pot good and hot over medium-high heat until the oil shimmers and almost smokes. You want to hear a satisfying sizzle the moment the meat hits the pan.
- Sear the roast on all sides:
- Spend about 3 to 4 minutes on each side, resisting the urge to move it around. Let it develop a deep, dark brown crust, almost mahogany in color, before flipping to the next side.
- Build the aromatic base:
- Remove the seared meat to a plate and add your onions and garlic to those flavorful browned bits in the bottom of the pot. Sauté just until the onions start to soften and the garlic becomes fragrant, about 2 to 3 minutes.
- Add all your vegetables:
- Toss in the carrots, potatoes, and celery, stirring to coat them in the rendered fat and pick up all those caramelized bits on the bottom. This quick sauté jumpstarts their flavor development.
- Nestle the beef back into the pot:
- Return the roast to its home, arranging it so it sits comfortably on top of and nestled among the vegetables. The meat should fit snugly but not be cramped.
- Pour in your braising liquid:
- Add the beef broth, water, and Worcestershire sauce, then sprinkle in the smoked paprika, thyme, rosemary, and tuck in the bay leaves. The liquid should come about halfway up the sides of the meat, not fully submerge it.
- Cover tight and slide into the oven:
- Put that lid on firmly to trap all the moisture, then carefully transfer the heavy pot to the preheated oven. Set your timer and try not to open the door too often to check.
- Let it braise for 2.5 to 3 hours:
- The kitchen will start smelling incredible after about an hour, but trust the process. You'll know it's done when a fork slides into the meat with absolutely no resistance.
- Rest the meat before serving:
- Remove the roast and vegetables to a platter, covering loosely with foil to keep warm. This gives the meat juices time to redistribute so they don't all run out when you cut.
- Make the silky gravy:
- Skim any excess fat from the cooking liquid, then whisk the cornstarch and cold water until completely smooth before stirring it into the pot. Bring to a simmer on the stovetop, whisking constantly until it thickens beautifully, about 3 minutes.
- Serve it up family style:
- Slice or shred that tender beef and arrange it on a platter surrounded by the soft vegetables. Pass the gravy separately so everyone can spoon as much as they want over everything.
 Pin it
 My youngest daughter, who claimed she hated pot roast for years, finally tried this at a family gathering last Thanksgiving. She took one bite, eyes wide, and asked why I'd never made this before, not realizing I'd been making it exactly this way for decades. Now it's the only thing she requests for her birthday dinner.
The Secret to Perfect Gravy
I used to struggle with lumpy gravy until my mother-in-law showed me the trick of whisking the cornstarch into cold water until it's absolutely smooth before adding it to any hot liquid. Another thing I've discovered is that letting the gravy simmer for those full three minutes, even when it looks thickened earlier, cooks out any raw starch taste and gives it this professional glossiness.
Make It Your Own
Sometimes I'll add a cup of red wine along with the broth for extra depth, or throw in some parsnips with the other vegetables for their subtle sweetness. During fall, I've been known to add quartered sweet potatoes instead of russets, and they caramelize so beautifully in the braising liquid that people fight over the last piece.
Planning Ahead
This pot roast actually tastes better made a day ahead, giving all those flavors time to meld and develop even more complexity. I'll often make it on Sunday and simply reheat it gently on Monday for an effortless dinner that feels even better than the first day.
- Leftover gravy freezes beautifully for up to three months, so don't toss those precious drippings
- The meat slices more cleanly when chilled overnight if you're planning to use leftovers for sandwiches
- For meal prep, portion everything into containers with extra gravy poured over each portion to keep it moist
 Pin it
 There's something profoundly satisfying about a dish that takes care of itself in the oven, filling your home with anticipation while you go about your day. This pot roast is more than just dinner, it's a slow, gentle reminder that some things in life are worth the wait.
Recipe FAQs
- → What cut of beef works best for pot roast?
-
Chuck roast is ideal because its marbling and connective tissue break down during slow cooking, resulting in tender, flavorful meat that shreds easily.
- → Can I make this in a slow cooker instead?
-
Absolutely. Sear the beef first, then transfer everything to your slow cooker. Cook on low for 8-10 hours or high for 4-6 hours until fork-tender.
- → What vegetables pair well with Southern pot roast?
-
Classic choices include carrots, potatoes, celery, and onions. You can also add parsnips, sweet potatoes, or turnips for variation while keeping that Southern comfort.
- → How do I know when the roast is done?
-
Insert a fork into the thickest part. If it twists easily and the meat pulls apart with minimal resistance, your pot roast is perfectly tender and ready to serve.
- → Can I prepare this dish ahead of time?
-
Pot roast actually tastes better the next day as flavors deepen. Prepare up to 3 days ahead, refrigerate, and reheat gently on the stove. The gravy may need thinning with a splash of broth.
- → What sides complement Southern pot roast?
-
Cornbread, buttermilk biscuits, or buttered dinner rolls soak up that delicious gravy. Green beans, collard greens, or macaroni and cheese round out a authentic Southern spread.
