 Pin it
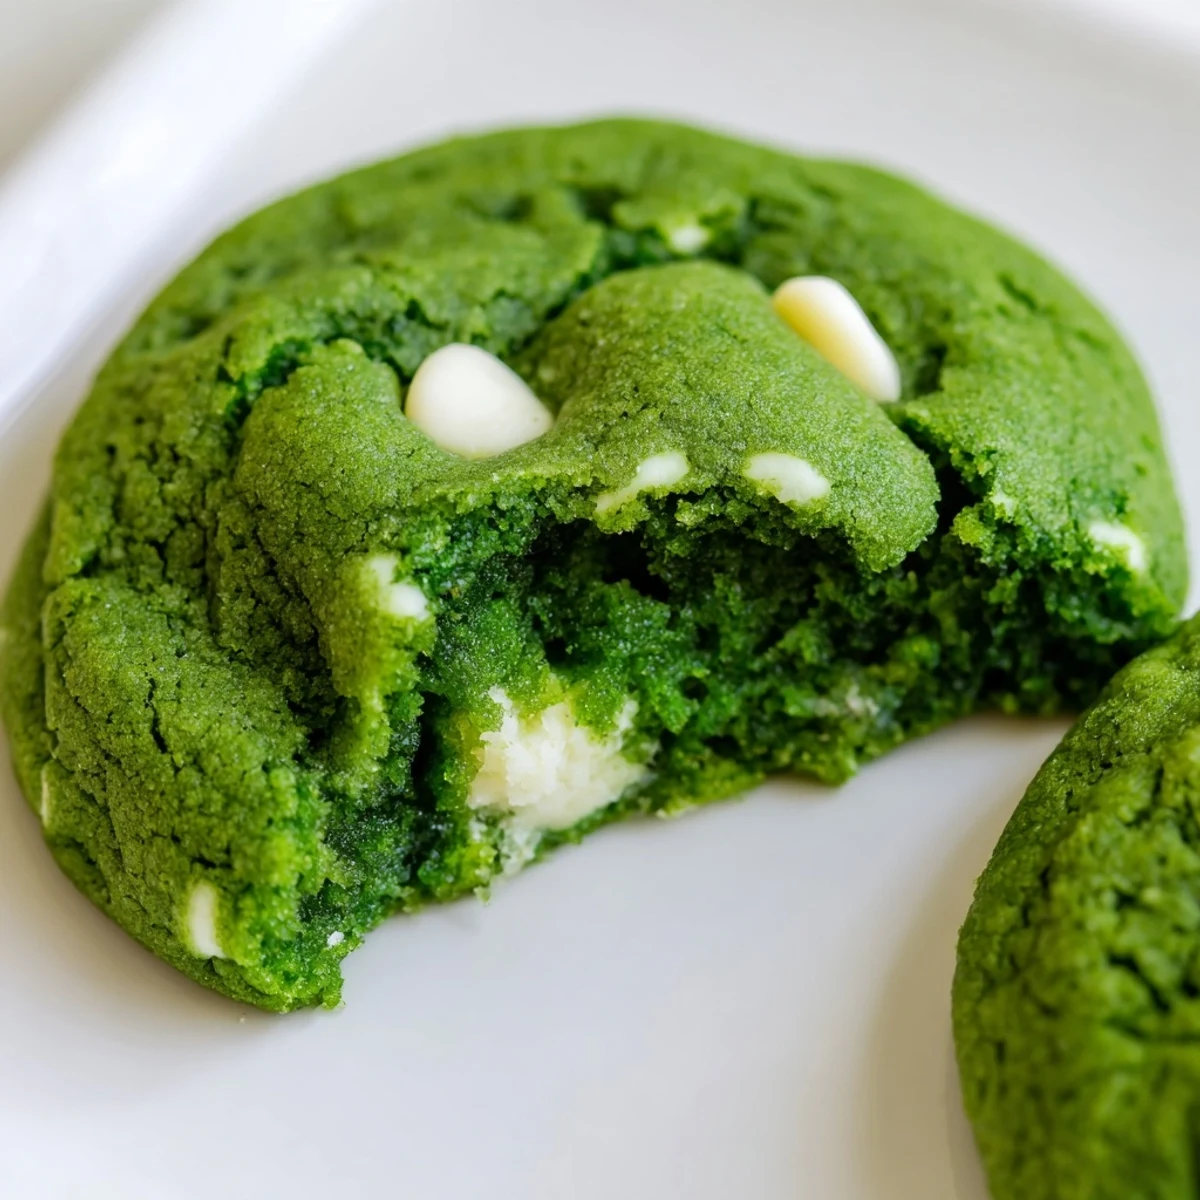
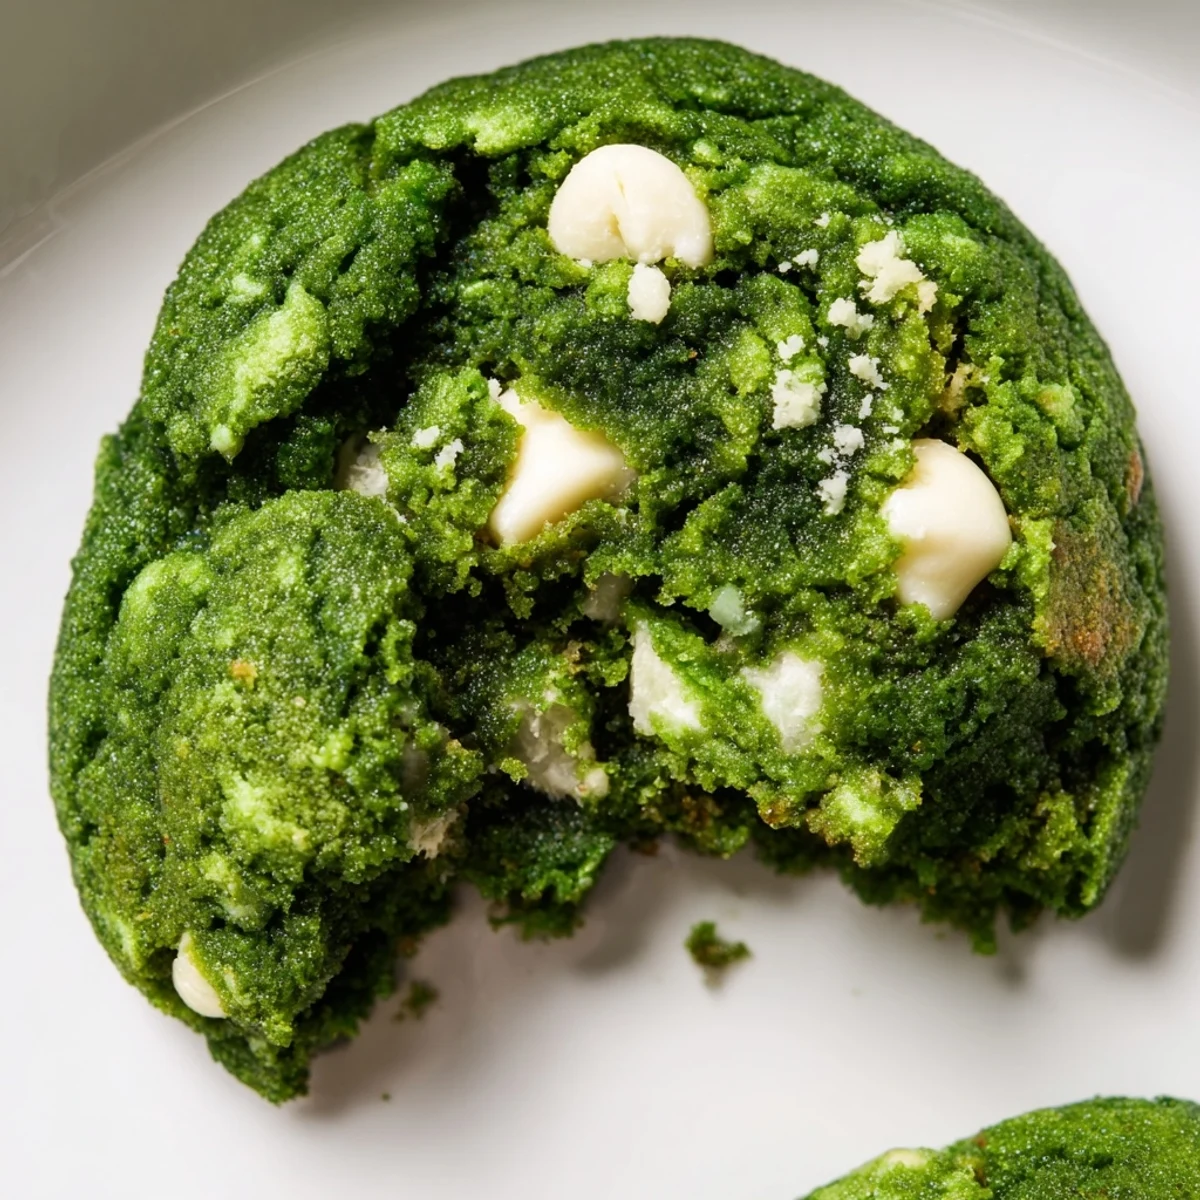
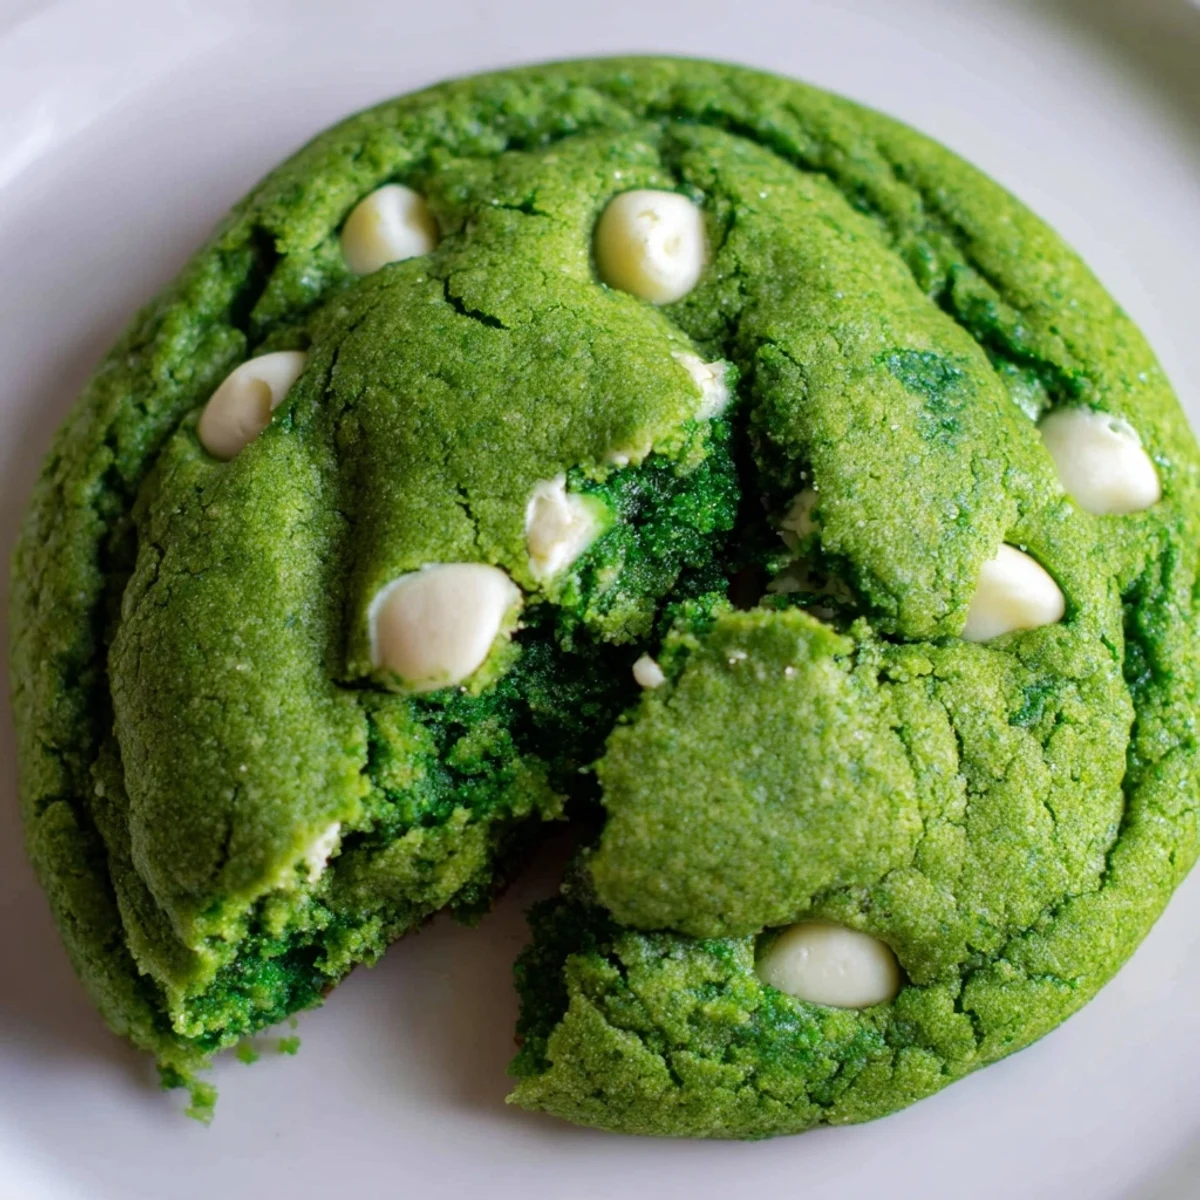
 These vibrant green velvet cookies combine the soft, chewy texture you love with a subtle hint of cocoa and creamy white chocolate chips. The dough comes together in just 20 minutes and bakes in 12, delivering 24 perfectly portioned treats. The green color makes them ideal for St. Patrick's Day, Christmas, or any celebration, while the white chocolate adds sweetness that balances the cocoa's depth.
For the best results, use gel food coloring for the most vivid green hue without altering the dough's consistency. The vinegar interacts with baking soda to create the signature tender crumb, while the mix of granulated and brown sugar ensures edges that are slightly crisp with centers that remain delightfully soft.
The first time I made these green velvet cookies was actually on a total whim. I'd been craving something festive but didn't want to commit to a full red velvet cake situation. My roommate walked into the kitchen, saw the electric green dough, and immediately asked if I'd lost my mind. But when those cookies came out of the oven chewy with that perfect white chocolate bite, she ate three before they even cooled down completely.
I brought a batch to my friend's St. Patrick's Day party last year, completely forgetting that half the people there were self proclaimed cookie skeptics. Someone actually asked if they were safe to eat because the color was so vibrant. By the time I left, the host's mom had cornered me in the kitchen demanding the recipe. Sometimes the most suspicious looking treats end up being the ones everyone talks about for weeks.
Ingredients
- All-purpose flour: The foundation that gives these cookies their perfect chewy structure
- Unsweetened cocoa powder: Just enough to add sophistication without overpowering the delicate flavor
- Baking soda: Creates those gorgeous cracks on top and helps the cookies spread perfectly
- Salt: Essential for balancing the sweetness and making all flavors pop
- Unsalted butter: Use it softened but not melty for the best texture and creaminess
- Granulated and brown sugar: The combination gives crisp edges and chewy centers
- Eggs: Room temperature eggs incorporate better and help the cookies hold their shape
- White vinegar: The secret ingredient that reacts with baking soda for extra tenderness
- Green food coloring: Gel coloring gives the most vibrant hue without thinning the dough
- White chocolate chips: The creamy sweet counterpart that makes these cookies irresistible
Instructions
- Get your oven ready:
- Preheat to 350°F and line two baking sheets with parchment paper so you're not scrambling later.
- Whisk the dry team:
- Combine flour, cocoa powder, baking soda, and salt in a medium bowl. Set it aside while you tackle the wet ingredients.
- Cream the butter and sugars:
- Beat them together until they're light and fluffy, which usually takes about 2 to 3 minutes of serious mixing.
- Add the eggs one at a time:
- Beat well after each addition, then mix in the milk, vanilla, vinegar, and that gorgeous green food coloring.
- Bring it all together:
- Gradually add the dry ingredients, mixing just until combined. Don't overwork it or your cookies will be tough.
- Fold in the white chocolate:
- Gently incorporate those chips so they're evenly distributed throughout the vibrant green dough.
- Scoop and space:
- Drop tablespoon-sized balls onto your prepared sheets, leaving about 2 inches between each one for spreading.
- Bake to perfection:
- Pop them in for 10 to 12 minutes until edges are set but centers still look slightly soft and underbaked.
- The patience part:
- Let them cool on the baking sheet for 5 minutes before moving them to a wire rack. This step makes all the difference.
 Pin it
 My niece helped me make these last Christmas, and she was absolutely mesmerized by the transformation from plain dough to vibrant green. We made a huge mess, got food coloring everywhere, and ended up with slightly misshapen cookies that she insisted were better than the perfectly round ones. Some of my favorite baking memories are the ones where perfection takes a backseat to joy.
Getting That Perfect Green Color
I've learned through trial and error that gel food coloring is absolutely worth seeking out. The first time I used liquid coloring, my dough turned into a sticky mess that refused to hold its shape. Gel gives you that intense vibrant color with just a tiny amount, keeping your dough consistency perfect. Start with less than you think you need. You can always add more, but you can't take it back once that green is locked in.
The White Chocolate Factor
After experimenting with different chocolate combinations, I'm convinced white chocolate is the perfect match here. The creamy vanilla notes complement the subtle cocoa without competing for attention. Dark chocolate felt too heavy, and milk chocolate made these taste like completely different cookies. White chocolate lets that unique velvet flavor shine while adding pockets of sweetness throughout each bite.
Storage and Sharing
These cookies actually improve after sitting overnight, which I discovered completely by accident when I hid a batch from myself. The flavors meld together beautifully and the texture becomes even more chewy and satisfying. Store them in an airtight container at room temperature and they'll stay perfect for up to five days, though in my experience they rarely last that long.
- Layer parchment paper between stacked cookies to prevent sticking
- These freeze beautifully if you want to bake ahead for holidays
- Package them in clear bags tied with green ribbon for the most stunning gifts
 Pin it
 There's something genuinely joyful about biting into a cookie that looks like pure magic and tastes even better. Hope these bring a little extra color to your kitchen and a lot of smiles to your table.
Recipe FAQs
- → Why do these cookies have vinegar in them?
-
The vinegar reacts with baking soda to create a tender, velvety texture while helping the green color stay vibrant throughout baking.
- → Can I use liquid food coloring instead of gel?
-
Yes, but gel coloring provides more intense color without adding excess liquid to your dough. If using liquid, start with ½ teaspoon and adjust gradually.
- → How do I know when the cookies are done baking?
-
The edges should look set and slightly firm while the centers appear soft and slightly underbaked. They'll continue cooking on the hot baking sheet during the 5-minute cooling period.
- → Can I freeze the cookie dough?
-
Absolutely. Scoop the dough into balls, freeze on a baking sheet until solid, then transfer to a freezer bag. Bake from frozen, adding 1-2 minutes to the baking time.
- → What's the best way to store these cookies?
-
Keep them in an airtight container at room temperature for up to 5 days. Place a piece of bread in the container to maintain softness and prevent them from drying out.
- → Can I make these without cocoa powder?
-
The cocoa provides subtle depth that complements the white chocolate. If omitted, increase flour by 2 tablespoons, though you'll lose the characteristic velvet flavor profile.
